
Contents
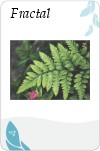
Some definitionsA card means a thumbnail representation of one of the 91 group pattern cards developed by the Group Pattern Language Project. Example:

A slot is a card-sized space outlined in black:

Slots are used to indicate spaces in which cards may be placed.
A layout is a specific physical arrangement of cards. Examples are 10 cards in a single row or five cards forming a "cross". Layouts are represented by a configuration of slots. For example, the five card cross layout would look like this:
In creating a layout, you will arrange slots at particular spots on the page. There will be a total of 100 spots for you to choose from, arrayed in 10 rows of 10 columns each. Each spot is a small black square in the center of the area where a slot can be placed, like this:

A map is a specific set of cards in a specific layout. Here is an example of a map in the five-card cross layout:


The purpose of this program is to enable you to create maps, associate them with titles and descriptions, and save them in a database for later viewing, modification, or deletion. These operations may require several steps and several different web pages to complete. Each page has its own Help text giving detailed information about the functions provided on the page, and these details will not be repeated here. We will, however, summarize the steps required to accomplish selected tasks.
The entry point of the system is the main menu. This is the likely starting place for the common tasks described below.
Whenever you are not logged in to the site, a "Log in" link will appear in the Navigation menu in the upper right corner of the page. You can click this link to go to the site login page. After logging in you will be returned to the page from which you came, but if you had made any changes on the page before you logged in, they will be lost. [This feature is not currently working. You will be sent to the site home page and will have to navigate back to the Card Mapping menu manually. -- vine 9/25/12] If you do not have a username and password for the site, you can register here.
Note that you do not need to be logged in to view existing maps nor to create new maps and modify existing ones in the temporary context of your browser session, but you must be logged in to save your work in the database. If you are not, the "Save" and "Delete" buttons on the editing pages will be disabled, and when you close your browser the work will be lost.
Creating a new map can be accomplished in several ways:
On the main menu, click "Create a new map using default layout". On the resulting Edit Cards and Text page, prepare a series of cards in the default layout. You need not put a card in every slot. Optionally, enter a title and description for the map. When finished, click Save.
You should now be on the home page for the map. Click "Edit layout".
Drag the slotted cards into the desired "spots". Drag any unneeded slots into the area provided in the upper right. Click Save.
You should now be back at the home page, and the map should be displayed in the proper layout. Bookmark this page so you can return to it later.
On the main menu, click "Create a new map starting from layout". On the resulting Edit Layout page, drag the slots into the desired layout. If you need more slots, drag them from the "Get new slots here" generator in the upper left. If you have more slots than you need, drag the unneeded ones into the area provided in the upper right. Click Save.
You should now be on the home page for the map. Click the "Edit cards and text" link. In the resulting display, place the desired cards into the slots. Add a title and description if desired. Click Save.
You should now be back at the home page for the map. Bookmark this page so you can return to it later.
Go to the home page of an existing map, using any of the methods described in "View an existing map" above. On the home page, click the "New map with this layout" link.
You should now be on the "Edit Cards and Text" page with empty slots in the same layout as the existing map. Place the desired cards into the slots. Add a title and description if desired. Click Save.
You should now be back at the home page for the new map. Bookmark this page so you can return to it later.
Go to the home page of an existing map, using any of the methods described in "View an existing map" above. On the home page, click the "New map with this layout and cards" link.
You should now be on the "Edit Cards and Text" page with the same layout and cards as the original map. The title and description will be blank. Adjust the cards as desired for your new map and add a title and description if you wish. Click Save.
You should now be back at the home page for the new map. Bookmark this page so you can return to it later.
The image will always be "on top", covering any other displayed elements occupying the same area. If it is in an inconvenient location, you can drag it to a better one.
Double-clicking the larger image, in turn, will open a new browser window or tab (depending on your browser and its settings) showing the full groupworksdeck.org web page for the pattern represented by the card, including a comprehensive description, examples, and other resources.
You can double-click another card to replace the larger image with a different one, or click the X at the upper right of the image to dismiss it.